Frontend Best Practices with Kiro
What you will learn
This workshop walks you through configuring Kiro so that every frontend interaction — from creating a new project to building full features — follows your team's standards automatically. You write the rules once, and Kiro applies them every time.
A quick note on the tools we are using
For this workshop, we chose React + Vite as our example stack. But Kiro works with any frontend framework: Vue, Angular, Svelte, plain HTML, or anything else. The concepts you learn here (steering, skills, hooks, specs) apply regardless of your framework choice.
If you are new to these tools, here is what each one does:
- React is a JavaScript library for building user interfaces, originally created by Meta. It lets you break your UI into reusable pieces called "components" — a button, a card, a whole page — and compose them together.
- Vite (pronounced "veet") is a fast build tool. It serves your code during development and bundles it for production. Think of it as the engine that runs your app locally so you can see changes in the browser instantly.
- ESLint is a tool that checks your JavaScript code for common mistakes. It works like a spell-checker, but for code — catching things like unused variables, missing imports, or inconsistent formatting.
What we are building
The goal is to build an internal tool for Vopak — a terminal management dashboard styled like the AWS Console. By the end, you will have a working "Terminal Overview" page that lists storage terminals with their name, location, capacity, and operational status.
You will work through seven exercises:
- Build a full landing page from a single prompt using Kiro's Vibe mode
- Create steering files — both auto-generated foundations and custom rules — that encode your frontend conventions
- Import agent skills from the open-source community for React best practices
- Use web search to avoid outdated code and get current documentation
- Compare AI models — see how Auto and Claude Sonnet 4.5 reason differently about the same problem
- Use Spec mode to plan and build a Terminal Overview dashboard with all layers working together
- Connect Chrome DevTools MCP to debug, screenshot, and test your running app directly from Kiro
Estimated time: ~1 hour 45 minutes for the core workshop (Exercises 1–7 + Summary). Two bonus exercises are available if time permits.
Kiro uses three complementary systems to understand your project. Steering gives persistent project knowledge. Skills provide on-demand expertise from the community. Hooks automate actions on IDE events. This workshop covers all three.
Exercise 1: Build a page from scratch with Vibe mode
In this exercise, you will go from an empty folder to a fully working web page in a single prompt. This is Kiro's Vibe mode — you describe what you want in plain language, and Kiro builds it. No manual setup, no config files, no boilerplate.
Step 1: Open a new project folder in Kiro
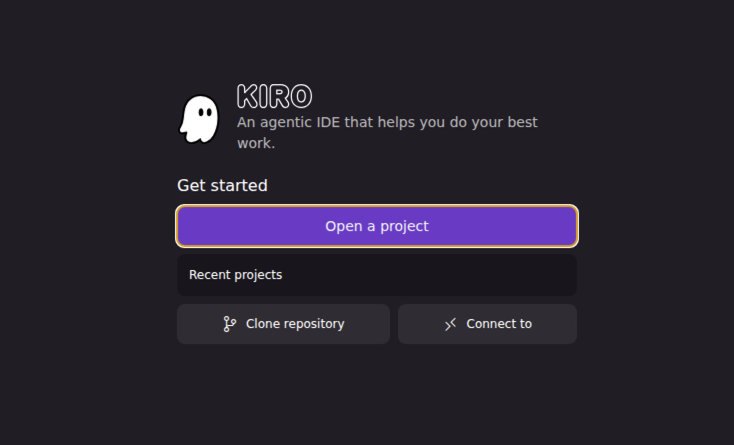
Open Kiro. On the welcome screen, click "Open a project".
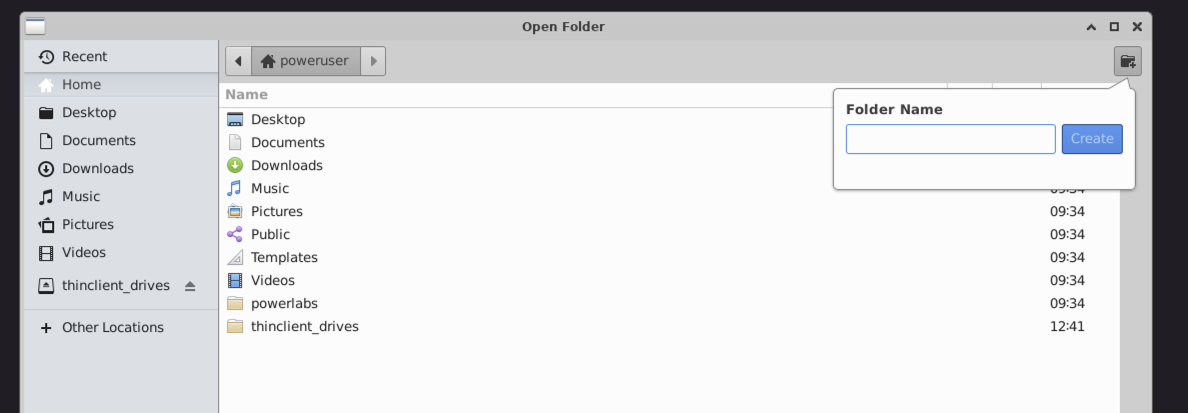
In the file browser, create a new empty folder. Type a name (e.g., my-kiro-app) in the Folder Name field and click Create. Then select that folder and click Open.
Kiro will ask if you trust the authors of the files in this folder. Click "Yes, I trust the authors" to enable all features. This is required for Kiro to run commands, create files, and use hooks in your project.
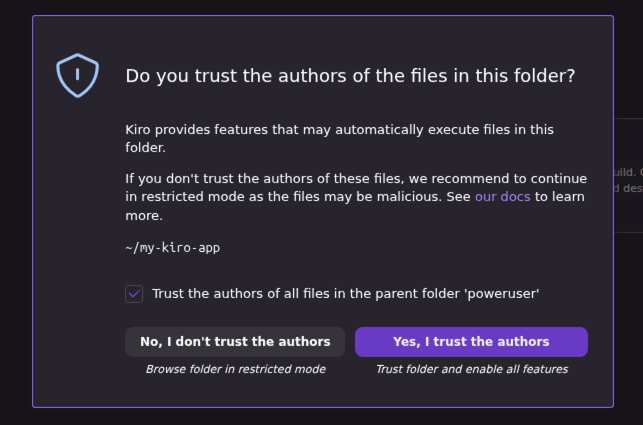
Kiro can automatically execute files and run commands in your project folder. If you open a folder from an untrusted source, it could contain malicious scripts. For this workshop, you are creating a brand-new empty folder, so it is safe to trust it.
If copy/paste between your Mac and a remote session (Windows App / Microsoft Remote Desktop) is not working, go to System Settings → Privacy & Security → Accessibility and Full Disk Access, and make sure the remote desktop app is listed and enabled.
Step 2: Open Vibe mode and build a page
In Kiro, click the + button in the chat panel to start a new session.
Select Vibe mode (chat first, then build).
Use this prompt:
Kiro created an entire project from scratch: folder structure, config files, React components, CSS styling, static data, and then installed dependencies and started the dev server. All from a single prompt. This is Vibe mode — you describe the end result, Kiro figures out the steps.
Step 3: See the result
Open your browser at http://localhost:5173. You should see a full landing page with a dark nav bar, a hero section, stats, and terminal cards.
The page works and looks reasonable — but look closely at the code Kiro generated. Here is how to check:
- Open
src/App.jsx— look at the top. You will likely seeexport default function App— that is a default export. Your team might prefer named exports (export function App). - Check if the terminal data is defined inside
App.jsxas aconst terminals = [...]array at the top of the file. In a well-structured project, this data would live in a separate file likesrc/data/terminals.js. - Open the CSS file — search for
#characters. You will likely find hardcoded colors like#0d1117,#1a1a2e,#c6f6d5. A maintainable project would use CSS variables likevar(--color-primary)instead. - Look at the HTML tags in the JSX. Kiro may have used
<nav>and<section>(good), but check if there arearia-labelattributes on interactive elements. Search forariaacross the project (Ctrl+Shift+F / Cmd+Shift+F) — you will probably find none. - Check the font stack in CSS — you may see
-apple-system, BlinkMacSystemFont, 'Segoe UI', Robotohardcoded instead of avar(--font-family)variable.
None of these are bugs — the code works fine. But without guidance, Kiro made its own choices about exports, file organization, color values, and accessibility. In Exercise 2, you will teach Kiro your conventions so it makes the right choices every time.
You should have a running React app with a visible landing page. The code works, but it may not follow your team's conventions yet — that's the point. We will fix that next.
Exercise 2A: Foundational steering — let Kiro learn your project
Why start with foundations?
Before you write custom rules, Kiro can auto-generate steering documents that describe your project's tech stack, product context, and file structure. These give Kiro a baseline understanding of your project so it does not have to guess what framework you are using, where your files live, or what your dependencies are.
Step 1: Generate steering docs
Open the Kiro panel on the left sidebar and find the Agent Steering & Skills section.
Click the + button at the top of the section.
From the dropdown, select "Project steering files" — the option that says "Automatically create project steering files that help establish core workspace context".
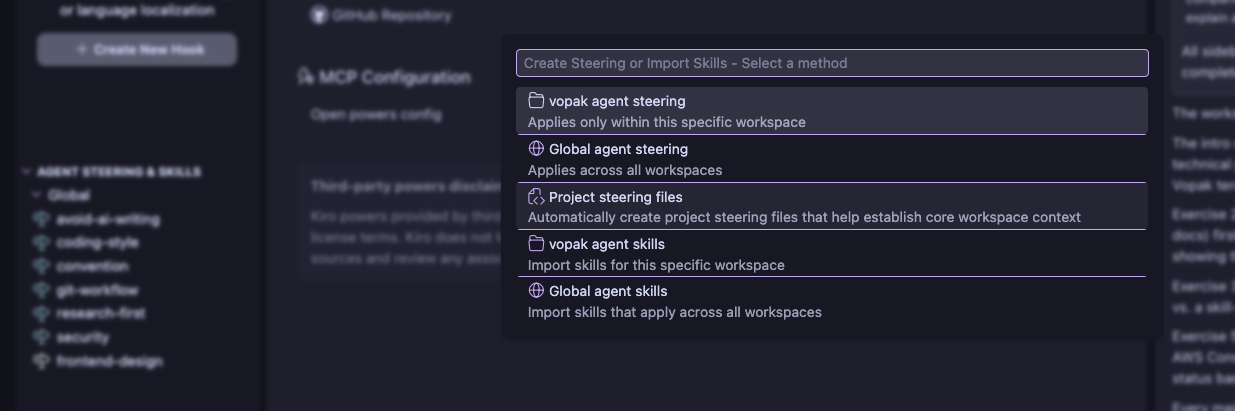
Kiro will scan your project and create three files automatically:
product.md— what your project does and who it is fortech.md— your tech stack, dependencies, and build toolsstructure.md— your folder layout and file organization
Without these files, Kiro starts every conversation with zero context about your project. It might suggest installing a library you already have, or organize files in a way that conflicts with your existing structure. The generated docs solve this by giving Kiro a map of your project from day one.
Step 2: Review the generated files
Open each file in .kiro/steering/ and read through them.
Look at the generated files and notice how Kiro detected your framework (React), your build tool (Vite), your linter (ESLint), and your folder structure. Check tech.md — it should list your dependencies from package.json. Check structure.md — it should reflect your src/ directory layout. These files are editable, so you can correct anything Kiro got wrong.
Exercise 2B: Custom steering — add your own rules
Why add custom rules?
The auto-generated docs tell Kiro what your project is. Custom steering tells Kiro how you want code written. Without it, Kiro makes reasonable guesses — but those guesses might not match your team's preferences.
Open the App.jsx and CSS files that Kiro generated in Exercise 1. That is your "without steering" baseline. Everyone's output will look slightly different, but you will likely notice some of these patterns:
export defaultinstead of named exports- Hardcoded hex colors (
#0d1117,#c6f6d5) instead of CSS variables - Data mixed into the component file instead of a separate data file
- No
aria-labelattributes on interactive elements - Hardcoded font stacks instead of a
var(--font-family)variable
Keep this code in mind — after adding steering, you will ask Kiro to create a new component and compare the output.
Here is what the same kind of component looks like when Kiro has steering rules:
With steering (the goal)
 1// ✓ With steering — Kiro follows your conventions
 2import './Card.css';
 3
 4export function Card({ title, children }) {
 5  return (
 6    <section className="card">
 7      <h3 className="card-title">{title}</h3>
 8      {children}
 9    </section>
10  );
11}
1.card {
2  background: var(--color-surface);
3  border-radius: var(--radius-md);
4  padding: var(--space-lg);
5  box-shadow: 0 1px 3px rgba(0, 0, 0, 0.1);
6}
7
8.card-title {
9  color: var(--color-text);
10}
Named export, semantic HTML (<section>), co-located CSS file, CSS custom properties instead of hardcoded values. That is the target. Let's set up the steering to get there.
Step 1: Create a component conventions file
Option A — copy the content below and create the file .kiro/steering/frontend-conventions.md:
 1# Frontend conventions
 2
 3## Stack
 4- React 19 with Vite
 5- JavaScript (not TypeScript)
 6- Plain CSS with custom properties — no Tailwind, no CSS-in-JS
 7- ESLint for linting
 8
 9## Component rules
10- Function components only, no class components
11- Named exports: `export function MyComponent()`, never default exports
12- Destructure props in the function signature
13- One component per file, filename matches component name in PascalCase
14- Place components in `src/components/`
15- Place shared data and constants in `src/data/`
16
17## Styling
18- Define a design token system using CSS custom properties in `src/index.css`
19- Never hardcode colors, spacing, or font sizes — always use variables
20- Component-specific styles go in a co-located `.css` file
21
22## Accessibility
23- Use semantic HTML: `<nav>`, `<main>`, `<section>`, `<header>`, `<footer>`
24- ARIA labels on all interactive elements
25- Minimum 4.5:1 contrast ratio
26- All interactions must be keyboard accessible
Option B — or ask Kiro to create it for you:
Step 2: Create a conditional CSS steering file
Option A — create .kiro/steering/css-tokens.md with a fileMatch pattern — it only loads when CSS files are in context:
 1---
 2inclusion: fileMatch
 3fileMatchPattern: "**/*.css"
 4---
 5
 6# CSS design tokens
 7
 8When writing or editing CSS in this project, always use these tokens:
 9
10- Colors: `--color-primary`, `--color-secondary`, `--color-bg`, `--color-surface`, `--color-text`, `--color-text-muted`
11- Status: `--color-success`, `--color-warning`, `--color-error`, `--color-info`
12- Spacing: `--space-xs` (4px), `--space-sm` (8px), `--space-md` (16px), `--space-lg` (24px), `--space-xl` (32px)
13- Radii: `--radius-sm` (4px), `--radius-md` (8px), `--radius-lg` (16px)
14- Font: `--font-family`, `--font-mono`
15
16Never hardcode hex values, pixel spacing, or font stacks.
Option B — or ask Kiro to create it:
Step 3: Test your steering
Open a new Kiro chat and ask it to create a component. The output should follow your conventions:
Kiro should produce a Card.jsx with a named export, destructured props, and a co-located Card.css that uses var(--color-surface) and var(--radius-md) instead of hardcoded values. Compare this to the "without steering" example above. If the output still uses default exports or Tailwind classes, check that your steering files are in .kiro/steering/ and visible in the Kiro panel.
Steering best practices
As you write and maintain steering files, keep these two rules in mind:
To understand why this matters, you need to know how Kiro "sees" your project. Everything Kiro reads — system instructions, steering files, your files, conversation history, and your current prompt — goes into a context window. This is the total amount of information the model can process at once:
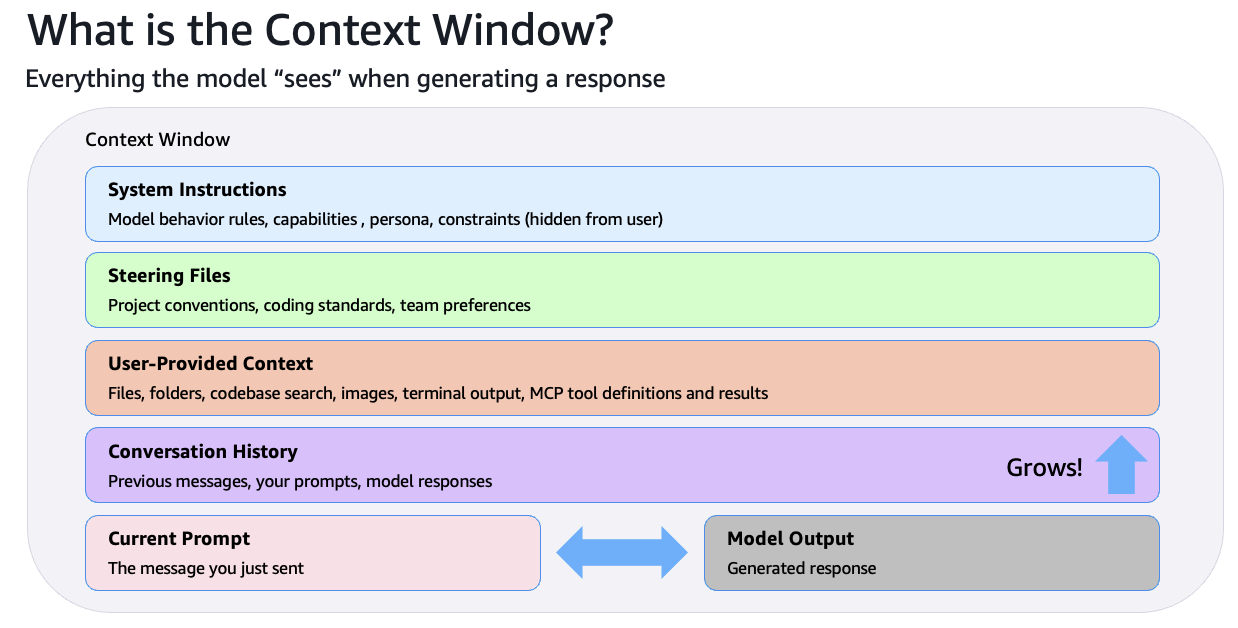
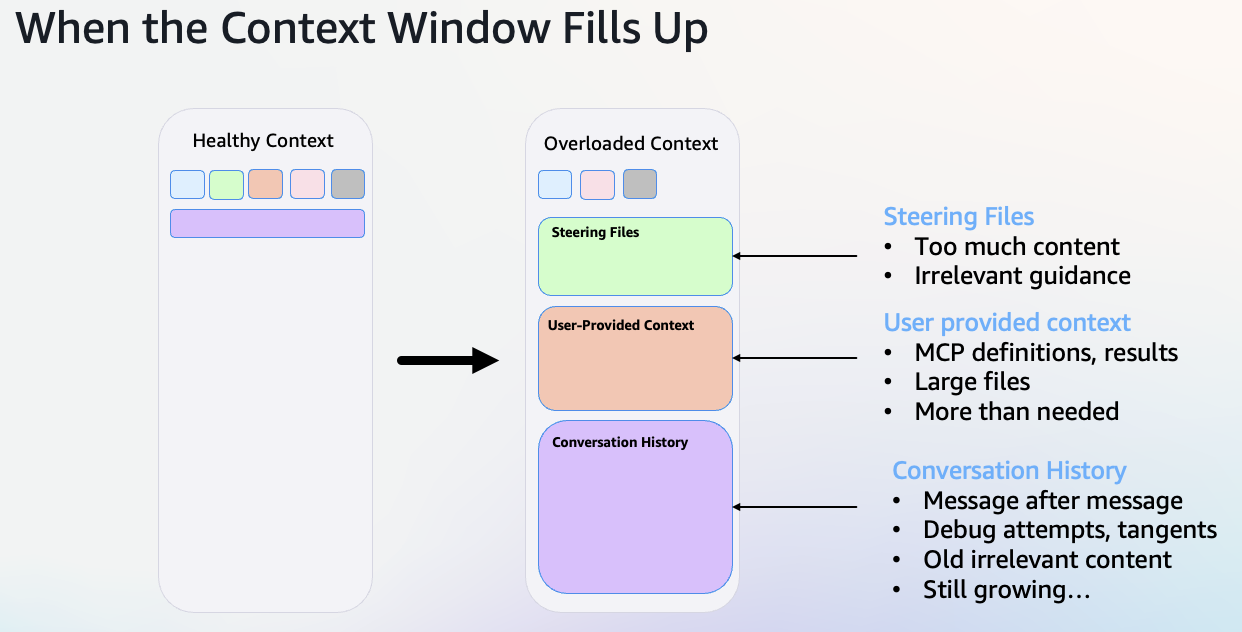
The context window has a fixed size. When it fills up — with too much steering content, large files, long conversation history — the model loses focus and quality drops:
This is why what you put in steering files matters. Kiro already knows common programming patterns, standard library docs, and general best practices. Putting that in your steering wastes context space. Avoid this:
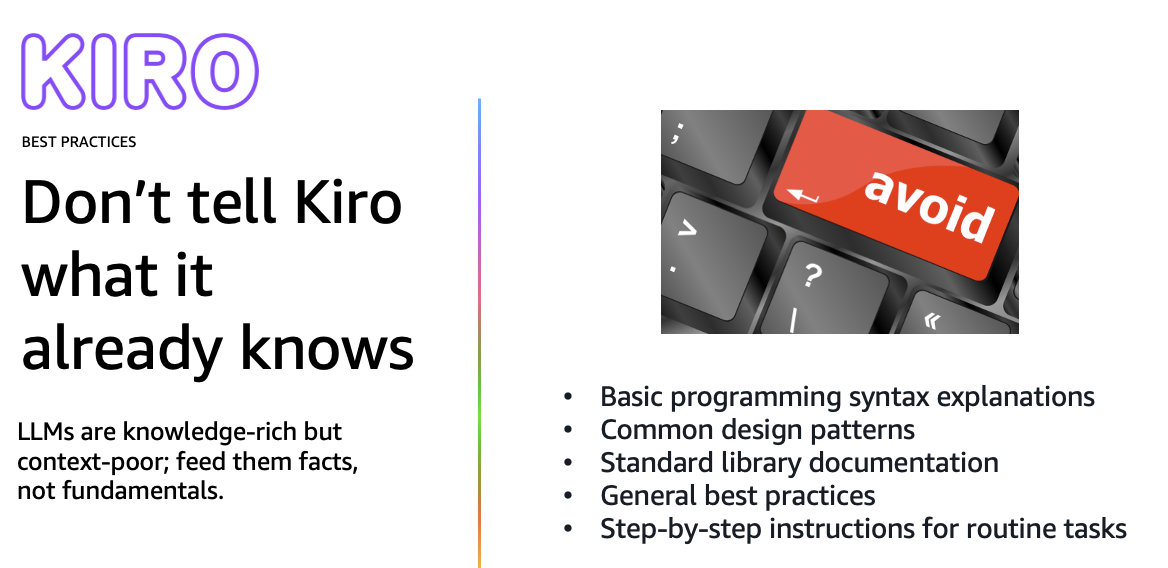
Instead, focus on project-specific context that Kiro cannot figure out on its own — your conventions, architecture decisions, business domain, and constraints:
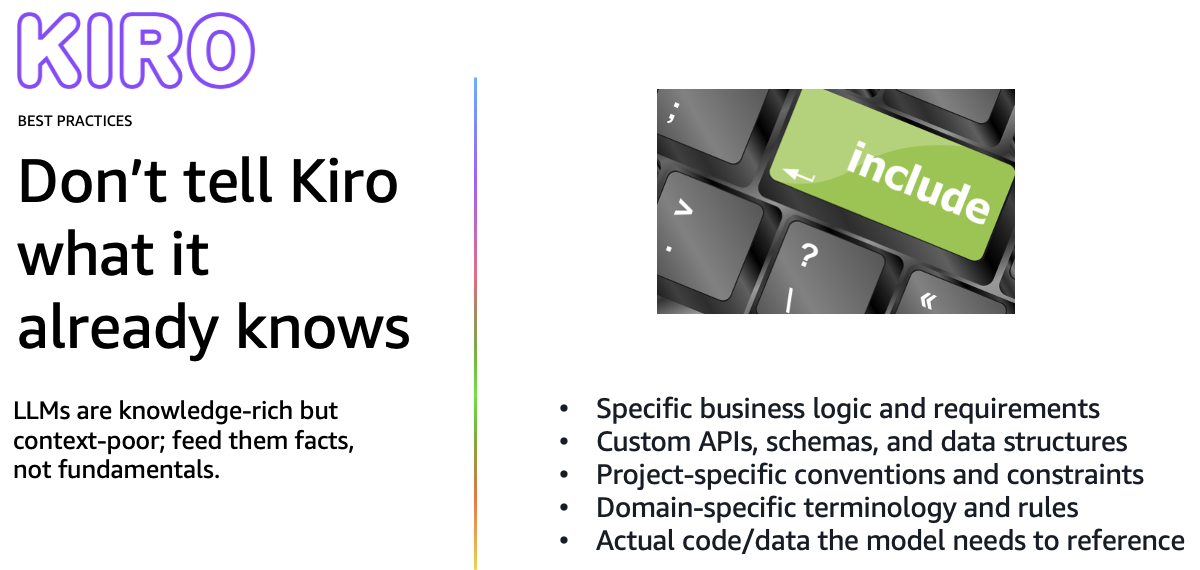
If you could find the information on the first page of a Google search, Kiro probably already knows it. Save your steering for the things that live in your team's heads — naming conventions, folder structures, which libraries to use (and which to avoid), and what your business domain looks like.
Exercise 3: Import agent skills from the community
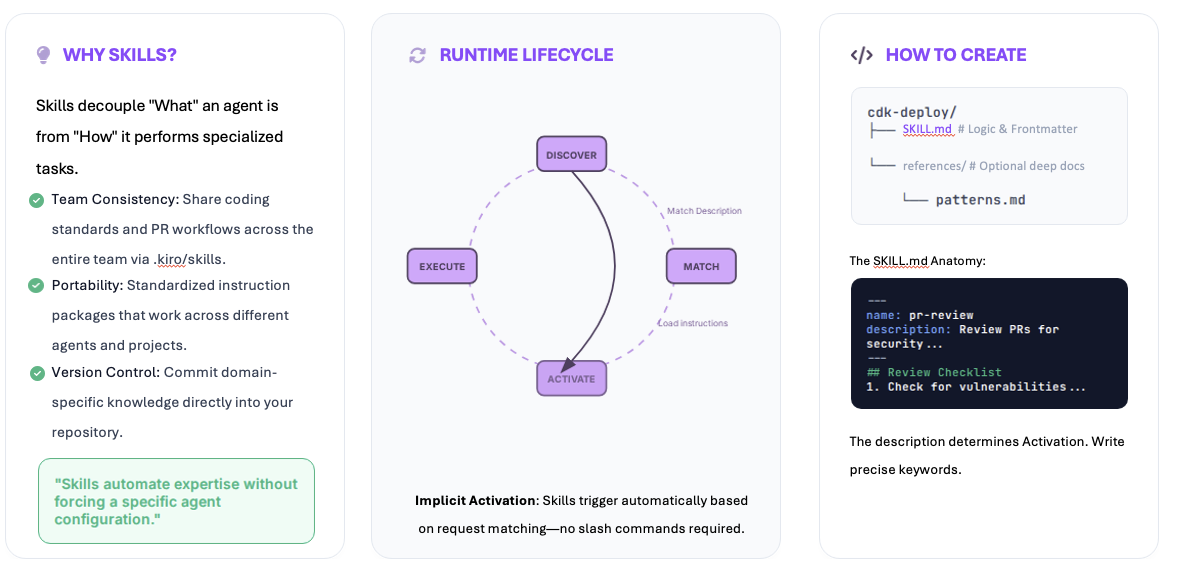
What are skills?
Skills are portable instruction packages that follow the open Agent Skills standard — a way for the community to share best-practice instructions that any AI coding tool can use. They bundle patterns, rules, and templates into reusable packages. Kiro loads only the name and description at startup, then activates the full instructions on demand when your task matches.
In plain terms: if steering is your team's internal style guide, skills are like importing an expert's playbook. Someone already figured out the best patterns for React performance, accessibility, or state management — skills let you use that knowledge without reading through hundreds of blog posts.
Step 1: Import the Vercel React best practices skill
Vercel is the company behind Next.js and one of the largest React hosting platforms. Their engineering team maintains a public set of React best practices covering performance, accessibility, and code organization. This skill packages those practices so Kiro can apply them automatically. It is open source, community-maintained, and regularly updated.
Option A — via the Kiro UI:
Open the Agent Steering & Skills section in the Kiro panel.
Click + → select my-kiro-app agent skills or Global agent skills → GitHub.
Paste this URL:
Option B — ask Kiro to import it for you (project-scoped):
Step 2: Verify and explore the skill
Check the Agent Steering & Skills section in the Kiro panel. You should see the skill listed:
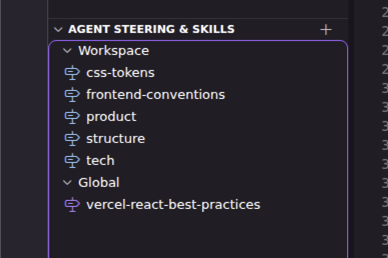
Click on the skill name to open it and explore the rules inside. You will see categories like performance optimization, accessibility, component patterns, and more.
Skills are version-controlled files in your project's .kiro/skills/ folder. You can edit them, update them, or remove them at any time. When the community publishes updates to a skill, you can re-import it to get the latest version. Think of skills as living documents — they evolve as best practices change.
Step 3: Test the skill with a prompt
Open a new Kiro chat session (start fresh so the skill loads).
Use this prompt:
Look at Kiro's response in the chat panel. You should see:
- An "Activated Skill" badge showing
react-best-practices— this confirms the skill was loaded and used. - Kiro explaining what it changed and why — for example, "added
useMemoon the filtered list to avoid re-filtering on every render" or "movedaria-liveto a container element." - The generated code should include performance patterns (caching, stable references), accessibility features (
aria-label,aria-live,<button>for clickable items), and edge case handling (empty state when no results match).
Compare this to the code Kiro generated in Exercise 1 (the Vibe mode landing page). That code was functional but did not include these optimizations — because the skill was not installed yet. Same tool, same steering, but the skill added 62 expert-level rules that Kiro now applies automatically.
Bonus skill: Anthropic's frontend-design
Anthropic — the company behind Claude, the AI model that powers Kiro — maintains an official set of agent skills. Their frontend-design skill focuses on creating distinctive, production-grade frontend interfaces with high design quality. Instead of generating generic-looking UI, it pushes Kiro to make creative choices about typography, color, layout, and motion.
To install it, use the same process as before:
Option A — via the Kiro UI:
In Agent Steering & Skills, click + → my-kiro-app agent skills → GitHub and paste:
Option B — ask Kiro:
The Vercel skill optimizes your React code (performance, patterns, accessibility). The Anthropic frontend-design skill optimizes how your UI looks (typography, color palettes, layout composition, animations). They work well together — one handles the code quality, the other handles the visual quality.
Step 4: Refactor your landing page with the frontend-design skill
Now that both skills are installed, let's see the frontend-design skill in action. Ask Kiro to redesign the landing page you built in Exercise 1:
Open a new Kiro chat session.
Use this prompt:
Look for the "Activated Skill" badge showing frontend-design in Kiro's response. The refactored page should look noticeably different — better typography, refined colors, smoother hover effects, more intentional spacing. Open the browser and compare the visual result to what you had before. Same data, same components, but a more polished look.
Other skills worth exploring
| Skill | What it does | Install |
|---|---|---|
frontend-ui-engineering |
Component architecture, design systems, WCAG 2.1 AA | npx skills add addyosmani/agent-skills --skill frontend-ui-engineering |
react-doctor |
Scans React code for security, performance, architecture (0–100 score) | npx skills add millionco/react-doctor --skill react-doctor |
react-state-management |
Zustand, Redux Toolkit, Jotai, React Query — decision criteria and patterns | npx skills add wshobson/agents --skill react-state-management |
Skills best practices
Kiro uses the description to decide when to activate. Include specific keywords: "Review pull requests for security and test coverage" beats "helps with code review."
Put detailed documentation in references/ files. Kiro loads the full SKILL.md on activation, so keep it concise.
Validation, file generation, and API calls work better as scripts than LLM-generated code.
Global for personal workflows (your review checklist), workspace for team procedures (project deployment).
Steering = your project-specific rules (always loaded or file-matched).
Skills = general best practices from the community (loaded on demand when relevant).
Use both. They complement each other.
Exercise 4: Web search — avoid outdated code and hallucinations
The problem: AI models have a knowledge cutoff
AI models are trained on data up to a certain date. After that, they don't know about new releases, API changes, or deprecations. This means Kiro might generate code that compiles without errors but uses deprecated APIs that will break in the next version — or worse, silently produce wrong behavior.
Kiro has built-in web search that can look up current documentation before generating code. In this exercise, you will see the difference it makes.
Step 1: Ask without web search context
Open a new Kiro chat session.
Use this prompt — it asks about a Vite configuration that changed recently:
Look at the generated config file. You don't need to understand every line — just notice these things:
- Does the code mention
rollupOptions? That is the old name (Vite 5/6). The new name isrolldownOptions(Vite 8). - Does it use
manualChunks? That is the old API. The new one is calledcodeSplitting. - Did Kiro mention anything about deprecation or version changes? Probably not — because it does not know about the update.
- Did the code compile and run? It probably did — and that is the tricky part. The code works today but uses an approach that is being phased out.
Think of it like getting driving directions from a 2-year-old map. The roads still exist, but some have been renamed and a new highway was built. You will get there, but not the best way.
Step 2: Ask with web search context
Open a new Kiro chat session.
This time, explicitly ask Kiro to check the latest documentation:
Watch Kiro's response — even if you are not technical, you can spot the difference:
- Did Kiro search the web before writing code? You should see a "web search" step in the response showing it looked up Vite documentation.
- Is the generated code different from the first version? Look for different words —
rolldownOptionsinstead ofrollupOptions, orcodeSplittinginstead ofmanualChunks. - Did Kiro explain why the old approach is deprecated? It should mention the migration from Rollup to Rolldown.
- The key takeaway: same question, but the second answer is based on current information instead of outdated training data.
Why this matters
This is not just about Vite. The same problem applies to any fast-moving technology: React Server Components, Next.js App Router, AWS SDK v3, Terraform provider updates. Without web search, Kiro relies on its training data — which may be months or years behind. With web search, it checks the source of truth before writing code.
You don't need web search for everything — basic React components, CSS patterns, and well-established APIs are fine without it. Use web search when:
- Working with a library that had a recent major version release
- Configuring build tools, bundlers, or deployment pipelines
- Using cloud provider APIs (AWS, Azure, GCP) that change frequently
- Something feels wrong or you see deprecation warnings
A good habit: when in doubt, add "search the web for the latest documentation on X" to your prompt.
Exercise 5: Compare models — Haiku vs. Sonnet 4.5
Kiro lets you choose which AI model powers your chat. Different models have different strengths — some are faster and cheaper, some reason more deeply. In this exercise, you will ask the same planning question to two different models and compare how they think.
Kiro offers several models. Here are the ones we will compare:
- Claude Haiku 4.5 — Anthropic's fastest model. Near-frontier intelligence at one-third the cost of Sonnet (0.4x credits). Great for quick iterations, simple tasks, and when you want to conserve credits.
- Claude Sonnet 4.5 — Anthropic's best model for complex agents and coding (1.3x credits). Plans ahead, handles multi-step tasks, and produces more thorough analysis. State-of-the-art on coding benchmarks.
Other models available include Auto (recommended default — picks the best model per task automatically), Opus (deepest reasoning, 2.2x credits), and several open-weight options like DeepSeek, MiniMax, and Qwen at lower cost.
Step 1: Ask Haiku to plan an architecture
Open a new Kiro chat session in Vibe mode.
When you submit the prompt, Kiro may ask if you want to start a Spec session. Select "No" — we want a regular Vibe conversation for this exercise, not a structured spec.

Change the model to Claude Haiku 4.5 using the model selector at the bottom of the chat panel.
Use this prompt — we are asking Kiro to think and plan, not generate code:
Read through the response. Notice the level of detail, the trade-off analysis, and the recommendation.
Step 2: Ask the same question with Sonnet 4.5
Open a new Kiro chat session (start fresh).
Change the model to Claude Sonnet 4.5 using the model selector at the bottom of the chat panel.
Use the exact same prompt:
Your results will vary — AI models are non-deterministic, so no two runs are identical. But compare the two responses and look for patterns like these:
- Both models will likely reach the same recommendation (polling). The difference is in how they get there and how much detail they provide.
- Does Sonnet 4.5 add context-specific analysis? For example, calculating actual numbers ("120 requests/hour", "2 requests/minute") or adding a "For your use case:" note after each option.
- Is the implementation plan more detailed? Sonnet may include things Haiku skips — like pausing polling when the browser tab is hidden, canceling in-flight requests, or showing a file structure preview.
- Does Sonnet think about the future? Look for a "migration path" or "when to reconsider" section that plans for changing requirements.
- Check the credits: look at "Est. Credits Used" at the bottom of each response. Sonnet typically uses about 3x more credits than Haiku for the same question.
- Check the time: look at "Elapsed time." The faster model is not always the one you expect — it depends on how much thinking each model does.
Neither model is "wrong" — both give useful answers. Haiku is fast, cheap, and good enough for many tasks. Sonnet 4.5 goes deeper and catches more edge cases. The right choice depends on the complexity of the problem. Use Haiku for quick iterations and simple tasks, Sonnet 4.5 for architecture decisions and complex planning, and Auto when you want Kiro to decide for you.
Exercise 6: Build a Terminal Overview dashboard with Spec mode
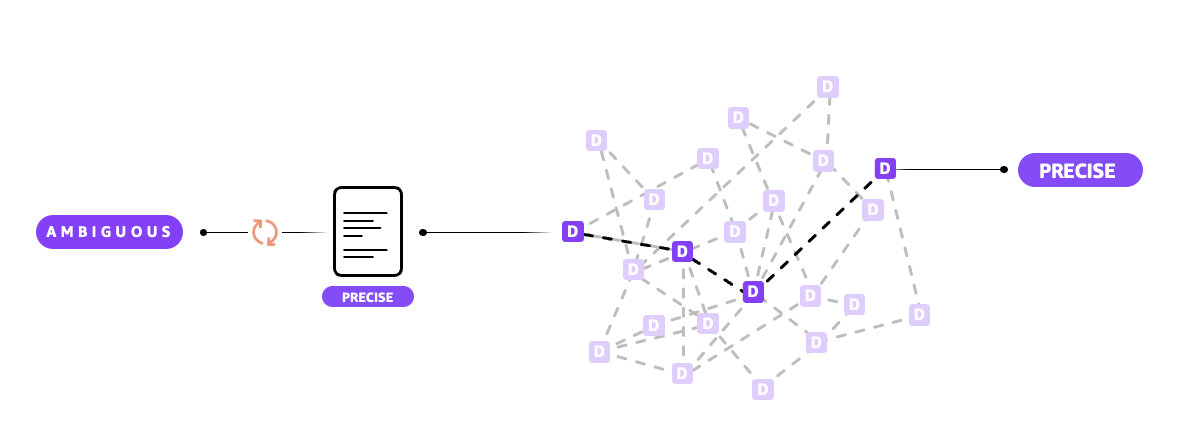
Spec mode is Kiro's structured approach to building features. Instead of jumping straight into code, it turns an ambiguous idea into a precise plan through a series of documents — requirements, design, and tasks — that you review and approve at each step. This diagram shows the flow:
Scenario
Vopak operates storage terminals around the world for chemicals, oil, gas, and LNG. Your team needs an internal Terminal Overview dashboard — a page that lists Vopak storage terminals with their name, location, capacity, and operational status. The design should follow the AWS Console style: dark top navigation, white content cards with subtle shadows, and color-coded status badges.
This is a self-contained feature that exercises everything you have set up: steering conventions, community skills, and automated hooks. In a real scenario, this dashboard could be connected to live data from Vopak's systems — for now, we will use static sample data.
Step 1: Start a Spec session
Click + in the Kiro chat panel to start a new session.
Select Spec mode.
Use this prompt:
After submitting the prompt, Kiro will ask what type of work this is. Select "Build a Feature":
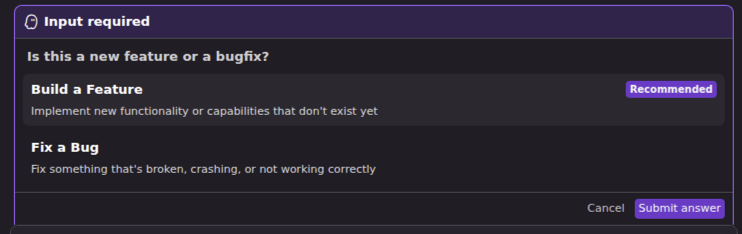
Next, Kiro will ask how you want to start. Select "Requirements":
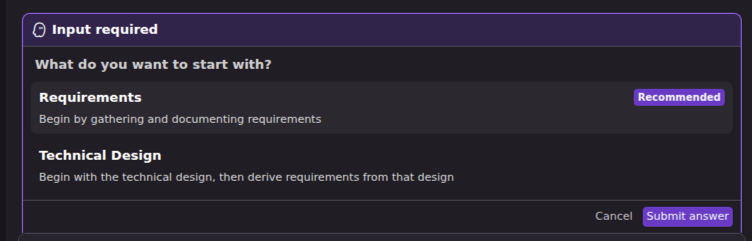
Kiro offers two workflows for building features:
Requirements-first (what we are using) — start by defining what the system should do, then design the architecture to meet those needs. Use this when:
- You know the behavior you want to build
- Architecture is flexible
- Building features driven by user feedback
- Starting a new project without technical constraints
Design-first — start with the technical architecture, then derive requirements from it. Use this when:
- You already have an architecture in mind
- System must meet strict performance or compliance requirements
- Porting design documents from other tools into Kiro
- Exploring technical feasibility before committing to scope
Step 2: Review the requirements
Kiro will generate a requirements.md. Check it against this list:
| Check | What to look for |
|---|---|
| Data model | Terminal fields defined (name, location, capacity, status) |
| Search behavior | Filters by name and location, case-insensitive, real-time |
| Status filter | Dropdown with All, Operational, Maintenance, Offline options |
| Layout | Responsive card grid, AWS Console styling, works on mobile |
| Status badges | Color-coded: green, amber, red with sufficient contrast |
| Accessibility | Search input has a label, cards use semantic markup, badges have text labels (not color-only) |
| Conventions | Named exports, CSS variables, components in src/components/ |
If the requirements look good, tell Kiro to continue. It will generate a design.md.
Step 3: Review the design
Your design will vary, but look for these patterns:
- Does it break the page into separate components? (e.g., a main page component, a card component, a search component)
- Is the terminal data in a separate file, not mixed into the components?
- Does the CSS reference your custom properties (
var(--color-*),var(--space-*))? - Does it mention responsive layout (CSS Grid or Flexbox)?
- Are there no new external dependencies added?
Step 4: Execute the tasks
Approve the design and let Kiro generate tasks.md. Then tell Kiro to execute all tasks.
Step 5: Verify the result
Once Kiro finishes executing the tasks, verify the result directly in the IDE:
- Check the file explorer on the left — you should see new component files in
src/components/and a data file insrc/data/ - Open the browser at
http://localhost:5173— the Terminal Overview page should be visible with cards, search, and status badges - Click through the files Kiro created and review the code
- Hardcoded hex colors instead of
var(--color-*) export defaultinstead of named exports- Missing
aria-labelon the search input or status filter - Status badges that rely only on color (no text label)
- Inline styles instead of CSS classes
- TypeScript files when you specified JavaScript
If you see any of these, your steering files may need adjustments. Iterate on them — that is the point of this exercise.
This is where everything comes together. Notice how the generated code follows your steering conventions (named exports, CSS variables, semantic HTML) and benefits from the React skill (performance patterns, accessibility). You wrote the rules once in Exercises 2–3, and they all applied here without you repeating anything in the prompt.
Spec best practices
Tips for getting the most out of Spec-driven development. Full guide →
Requirements-First when you know the behavior but architecture is flexible. Design-First when you have an existing technical design or strict non-functional requirements.
Include reproduction steps, current behavior, expected behavior, and constraints. The clearer the description, the better the root cause analysis.
Specs are living documents. Update requirements, refine designs, and regenerate tasks as your project evolves. Use the Refine and Update buttons.
Create separate specs for different features rather than one giant spec. This keeps documents focused and lets team members work independently.
Have requirements in Jira or Confluence? Copy them into a file and tell Kiro to generate a spec from it. Or use MCP to connect directly.
Type #spec in chat to include spec context. Use it when implementing tasks, refining designs, or validating your work against requirements.
Exercise 7: Debug and test your app with Chrome DevTools MCP
This exercise requires Google Chrome installed on your machine.
What is Chrome DevTools MCP?
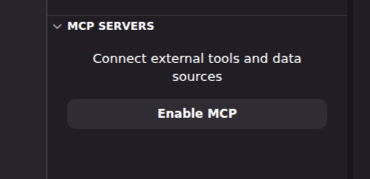
Chrome DevTools MCP lets Kiro control and inspect a live Chrome browser. It acts as an MCP server that gives Kiro access to the full power of Chrome DevTools — taking screenshots, checking console errors, analyzing network requests, and running performance audits. Instead of switching between Kiro and Chrome to debug, Kiro can do it directly.
Step 1: Configure the MCP server
Ask Kiro to add the Chrome DevTools MCP server to your project configuration:
Kiro will update your .kiro/settings/mcp.json file with the new server entry. The MCP server should connect automatically — check the MCP Servers panel to confirm chrome-devtools is listed as connected.
Step 2: Make sure your app is running
Before testing with Chrome DevTools, make sure your dev server is running. If it is not, ask Kiro to start it:
Your app should be running at http://localhost:5173.
Step 3: Take a screenshot and review
Ask Kiro to open your app in Chrome and take a screenshot:
Kiro will open Chrome (or connect to an existing instance), navigate to your app, capture a screenshot, and report any console messages.
Step 4: Run a performance audit
Ask Kiro to analyze your app's performance:
Step 5: Debug a specific interaction
Test the search functionality by asking Kiro to interact with the page:
Kiro is now acting as a QA tester. It opens a real browser, interacts with your app, captures visual evidence, and reports issues — all from the chat. This is useful for: verifying that UI changes look correct without switching windows, catching console errors you might miss, running performance audits without opening DevTools manually, and testing user flows end-to-end. Combined with your hooks (which check code quality) and skills (which check code patterns), the Chrome DevTools MCP checks the running application itself.
Other things you can do with Chrome DevTools MCP
| Capability | Example prompt |
|---|---|
| Check network requests | "Show me all network requests when the page loads" |
| Inspect accessibility | "Run an accessibility audit on the current page" |
| Test responsive design | "Take a screenshot at 375px width (mobile) and 1440px width (desktop)" |
| Find layout issues | "Check if any elements overflow their containers" |
MCP security best practices
MCP servers are third-party code that connects to external services. Follow these practices to stay secure. Full guide →
Never commit tokens to version control. Use environment variables instead of hardcoding values. Create tokens with minimal permissions.
Check parameters before approving tool calls. Only auto-approve tools from trusted sources that don't have write access to sensitive systems.
Use workspace-level configs for project-specific MCP servers. This keeps tokens and configurations isolated between projects.
Check MCP logs regularly (Kiro panel → Output → "Kiro - MCP Logs"). Review auto-approved tools periodically. Remove unused servers.
If you suspect an issue: disable the server immediately, revoke associated tokens, check for unauthorized activity, report to the maintainer.
Bonus A: Use Kiro Powers to generate Terraform for AWS deployment
This exercise is optional and goes beyond the core workshop. You do not need to actually deploy anything — the goal is to learn how Kiro Powers work by generating the infrastructure code.
What are Kiro Powers?
Powers are pre-packaged integrations that bundle MCP tools with documentation and workflow guidance. While steering teaches Kiro about your project and skills teach it best practices, Powers give Kiro access to external tools and services — like the Terraform registry, AWS documentation, or Figma designs.
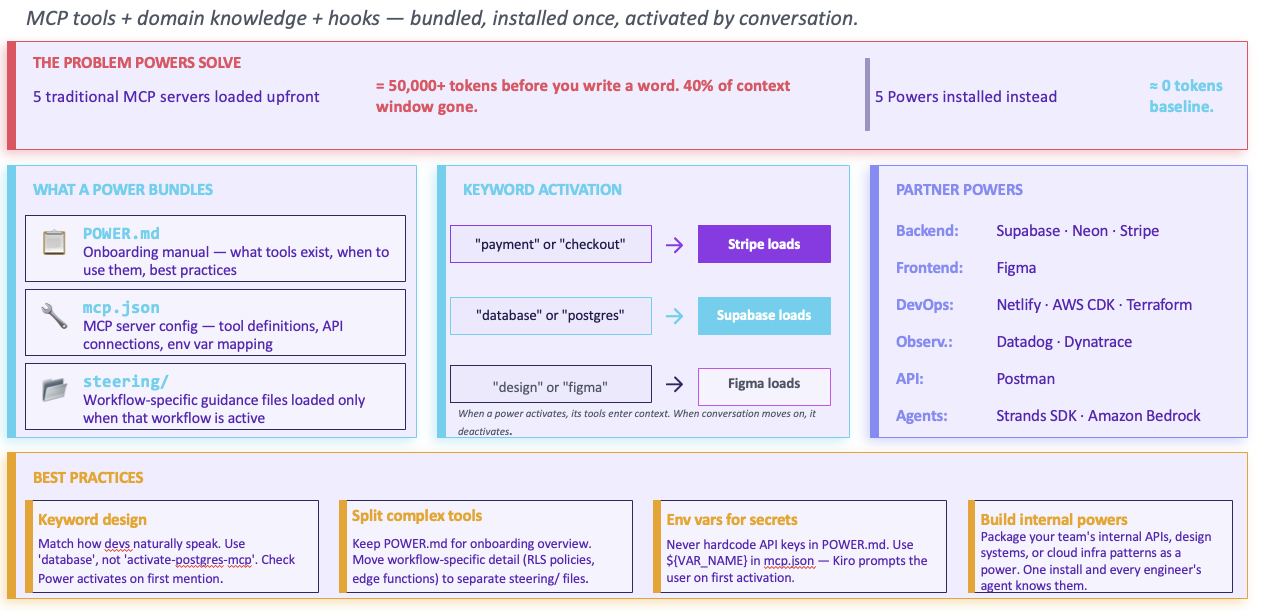
Think of it this way: steering is your team's style guide, skills are expert playbooks, and Powers are specialized toolboxes. The Terraform Power, for example, gives Kiro access to the HashiCorp registry so it can look up real provider documentation, module versions, and resource schemas when generating infrastructure code.
Step 1: Install the Terraform Power
Open the Kiro panel and click on Powers in the sidebar.
Search for "Terraform" in the Powers marketplace.
Click "Try power" on the "Deploy infrastructure with Terraform" power by HashiCorp.
Once installed, Kiro gains access to Terraform registry providers, modules, policies, and HCP workflow management tools.
Step 2: Ask Kiro to generate the infrastructure
Now ask Kiro to create the Terraform code that would deploy your Terminal Overview dashboard to AWS. You do not need to run terraform apply — the goal is to see how Powers work.
Step 3: Review the generated files
Kiro should create an infra/ directory with Terraform files. Check for:
1ls infra/
2# Expected: main.tf, variables.tf, outputs.tf, providers.tf
| File | What it should contain |
|---|---|
providers.tf | AWS provider configuration with region variable |
main.tf | S3 bucket, CloudFront distribution, OAC, bucket policy, Route 53 record |
variables.tf | Domain name, AWS region, environment tag |
outputs.tf | CloudFront URL, S3 bucket name, distribution ID |
Notice how Kiro used the Terraform Power to look up real AWS provider resources and their correct attribute names — not just guessing from training data. The generated code should reference actual Terraform resource types like aws_s3_bucket, aws_cloudfront_distribution, and aws_cloudfront_origin_access_control with correct syntax. Compare this to asking Kiro the same question without the Power installed — the Power gives it access to up-to-date registry documentation.
If you want to deploy for real, you would need AWS credentials configured (aws configure), then run cd infra && terraform init && terraform plan. But that is outside the scope of this workshop — the point here is seeing how Powers extend Kiro's capabilities beyond code generation into infrastructure tooling.
Bonus B: Automate quality checks with hooks
This exercise is optional. It shows how to automate repetitive checks so they run without you having to remember.
What are hooks?
Think of hooks as automatic reminders or checks. Just like your phone can remind you to drink water every hour, Kiro hooks can automatically check your code every time you save a file, create a new component, or submit a prompt. You set them up once, and they run in the background without you having to remember.
A hook is made of two parts: a trigger (when should it run?) and an action (what should it do?). Here are all the available triggers and actions:
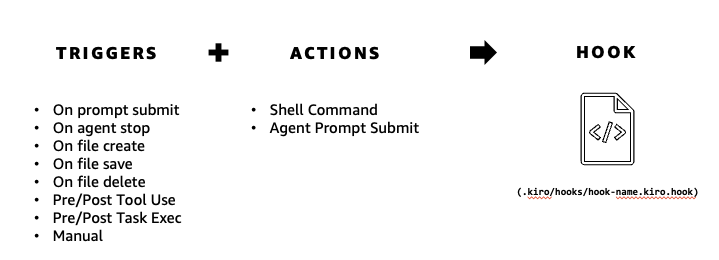
There are two ways to create a hook: describe it in natural language and let Kiro build it, or write the JSON file yourself. We will try both.
Step 1: Create a lint hook using natural language
This is the easiest way — you describe what you want and Kiro creates the hook for you.
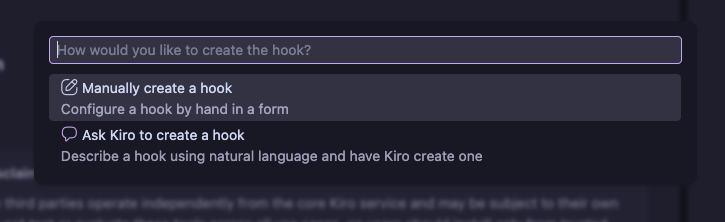
In the Kiro explorer, find the Agent Hooks section and click Create New Hook.
You will see two options. Select "Ask Kiro to create a hook" — the option that says "Describe a hook using natural language and have Kiro create one".
Describe the hook you want:
Kiro will generate the hook JSON file for you and save it in .kiro/hooks/.
Step 2: Create an accessibility review hook manually
Now let's create one by writing the JSON file directly — this gives you full control over the configuration.
Create the file .kiro/hooks/a11y-review.json with this content:
 1{
 2  "name": "Accessibility Review",
 3  "version": "1.0.0",
 4  "description": "Review new components for a11y issues",
 5  "when": {
 6    "type": "fileCreated",
 7    "patterns": ["src/components/*.jsx"]
 8  },
 9  "then": {
10    "type": "askAgent",
11    "prompt": "Review this new component for accessibility: semantic HTML, ARIA labels, keyboard navigation, color contrast using CSS custom properties, and focus management. List any issues."
12  }
13}
The lint hook uses "runCommand" — it runs a shell command and shows the output. The accessibility hook uses "askAgent" — it sends a message to Kiro's chat, which then analyzes the file and responds. Use runCommand for tools with CLI output (linters, test runners). Use askAgent when you want Kiro to reason about the code.
Verify your hooks
Check the Agent Hooks section in the Kiro explorer. You should see two hooks listed.
Test the lint hook: edit any .jsx file and save it. Watch the terminal panel — ESLint output should appear automatically. Test the a11y hook: create a new file in src/components/ (e.g., TestCard.jsx). Kiro should post a message in the chat listing any accessibility issues it found. You can delete the test file afterward.
Hooks best practices
Focus on one task per hook. Use numbered steps for complex operations. Write detailed, unambiguous instructions for agent prompts.
Test hooks with sample scenarios before relying on them. Start with limited file patterns before expanding. Verify edge cases.
Ensure hooks don't slow down your workflow. Consider the frequency of trigger events. Optimize prompts for efficiency.
Target specific file types or directories. Use precise file patterns to avoid unnecessary executions.
Maintain clear documentation of hook purposes. Store configurations in version control. Create standard hooks for common team workflows.
Update hook logic as your project evolves. Remove hooks you no longer need. Refine prompts based on actual results.
Summary and next steps
You configured three layers of Kiro's frontend workflow and used them together to build a Vopak Terminal Overview dashboard:
| Layer | What you did | When it activates |
|---|---|---|
| Steering | Generated foundational docs (product, tech, structure) and added custom rules for component patterns, CSS tokens, and accessibility | Always on, or when matching files are in context |
| Skills | Imported the Vercel React best practices skill for memoization, bundle optimization, and re-render prevention | On demand, when Kiro detects relevance to your task |
| Hooks | Set up ESLint on save, accessibility review on new components, and a convention guard before writes | On file save, file create, or before write operations |
| Powers | Used the Terraform Power to generate AWS infrastructure code with real registry data (Bonus A) | On demand, when you work with infrastructure or deployment topics |
| MCP | Connected Chrome DevTools to test, screenshot, and debug the running app from Kiro (Exercise 7) | On demand, when you ask Kiro to interact with a browser |
Together, these layers cover the full development lifecycle: steering and skills shape the code Kiro writes, hooks automate quality checks, Powers handle infrastructure, and MCP integrations let Kiro test the running application.
Next steps
- Explore Kiro Powers — MCP integrations that bundle tools with guidance (Figma validation, deployment automation, AWS infrastructure)
- Create a custom skill that encodes your team's specific component library
- Add a
postTaskExecutionhook that runs your test suite after each spec task completes - Connect the Terminal Overview to live data — replace the static
terminals.jswith an API call to Vopak's systems - Browse more community skills at awesome-frontend-skills
- Try the frontend-design built-in skill — type
/frontend-designin chat to activate it for high-fidelity UI generation